The Plantation Community
Lesson Six
TOYS MADE AT HOME
READ AND DISCUSS
Was your favorite toy made in the 18th century? Some toys that we have today were popular during George Mason's time, like marbles, kites, dolls, and tea sets. What's different is that many more toys were made at home with materials available on the plantation.
Materials found in nature and fabric were used for play. If you had imagination, many different things could be used.
What modern materials were not available in the 1700s?
ACTIVITY 1
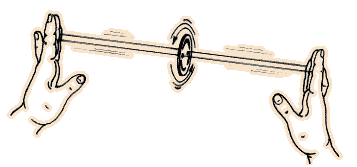
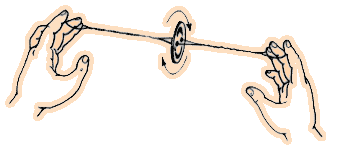
The whirligig was one toy made with everyday stuff. Children at Gunston Hall probably played with whirligigs made of painted wood. We'll make a modern whirligig!
What You Need: heavy cardboard, magic markers, construction paper, glue, string, and scissors.
1. Cut a 3-inch circle of cardboard. Make two holes in the center, about 1/2-inch apart. The holes should be just big enough for the string to go through.
2. Make a design on both sides of the whirligig. Use markers and shapes made out of construction paper.
3. Run a 36-inch string through the holes of the whirligig. Make a knot with the ends of the string.

4. Take the two ends of the string with the whirligig in between. Hold out your arms and turn the circle away from you. Do this until the string is very tight.

5. Pull the string. The toy will begin to unwind. What kind of sound does it make?
After you practice for a while, you should be able to keep the whirligig going for a long time!
ACTIVITY 2
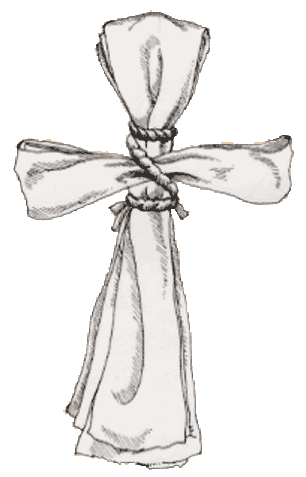
In slave families, parents sometimes made dolls for their children out of fabric scraps. Let's make our own.
What You Need: rectangular piece of material, yarn, scissors, and ruler.
1. Cut the material into six strips. Each strip should be 2" wide and 16" long.
2. Take two strips and fold them together into thirds. Set the strips aside.
3. Take the other strips and fold them together in half. Cut a 3" piece of yarn. Tie it one inch down the fabric to make the neck of the doll. (The fabric above the yarn is the head.)
4. Cut another 3" piece of yarn. Tie it around the middle to make the waist. You may keep the skirt and have a girl. Or, tie off the legs with yarn to make a boy.
5. Cut another 3" piece of yarn. Take the strips you folded into thirds. Tie these strips horizontally under the head to make the arms.
6. Add an apron, hat, and other items as you wish.
Directions for the doll were provided courtesy of The Colonial Williamsburg Foundation.
  |

![]()

